Setup VM for reverse engineering
Create a Virtual Machine on VMware
I’m using ReviOS’s Windows 10 Pro 1709 Optimized and Bloatware Removed version. Choose Custom Configuration from the list of options in the virtual machine creation section (advanced). The following are important parameters.
- Firmware type: UEFI and Secure Boot disabled
- Network connection: NAT
Consider your resources when making adjustments to the processors, memory, and hard drive.
After that, install Windows as usual.
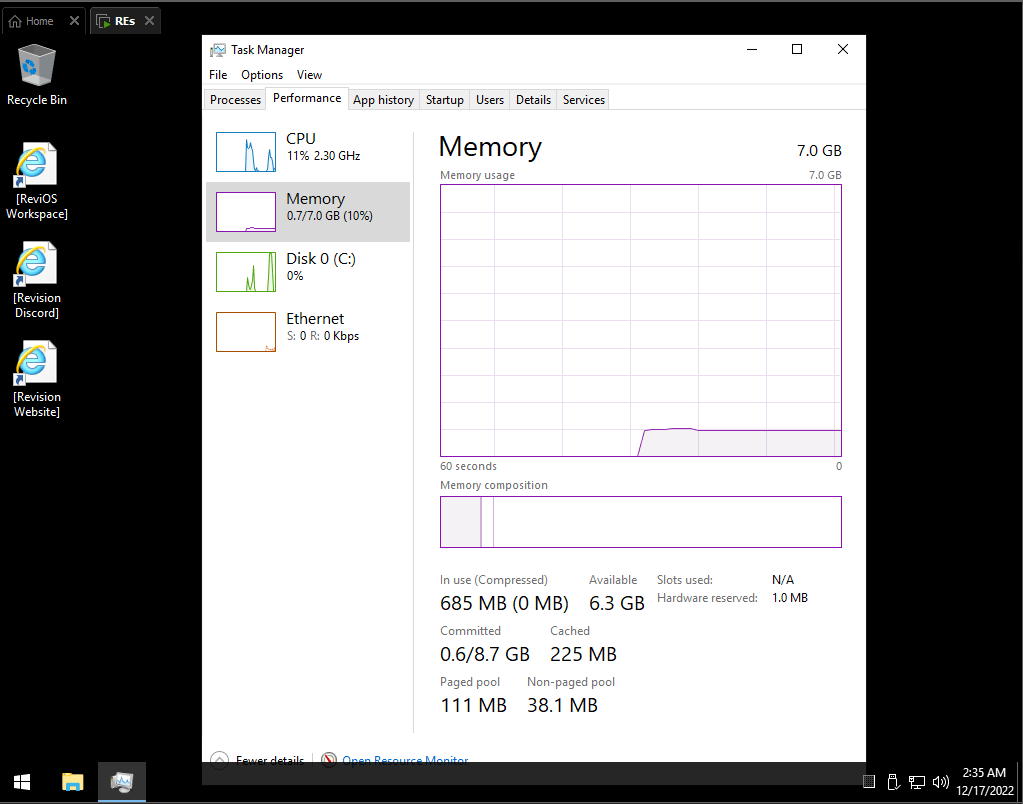
We now have a Windows virtual machine, and I’ve explained why I prefer Windows to ReviOS because it uses so little RAM. Only 0.7 GB of RAM is required for Fresh Install.
Post-Install
The next stage will be to install the apps and equipment required for game hacking after Windows has been installed.
It’s crucial that we avoid installing VMware tools because some games won’t let us launch them if they detect that we are running a VM.
For the reverse engineering game process, I installed these useful programs.
Programs list
- Browser: Brave
- File archiver: 7-Zip
- Debugger: x64dbg
- Disassembler: IDA Pro
- Kernel explorer: Windows Kernel Explorer (WKE)
- Anti-rootkit: OpenArk
- IDE and Code editor: VS 2019, VS Code, Lazarus, HxD, Notepad++
WKE and OpenArk are useful and practical programs. because the Reverse tab shows that we can access a lot of kernel and that OpenArk can download more reverse tools from within the software.
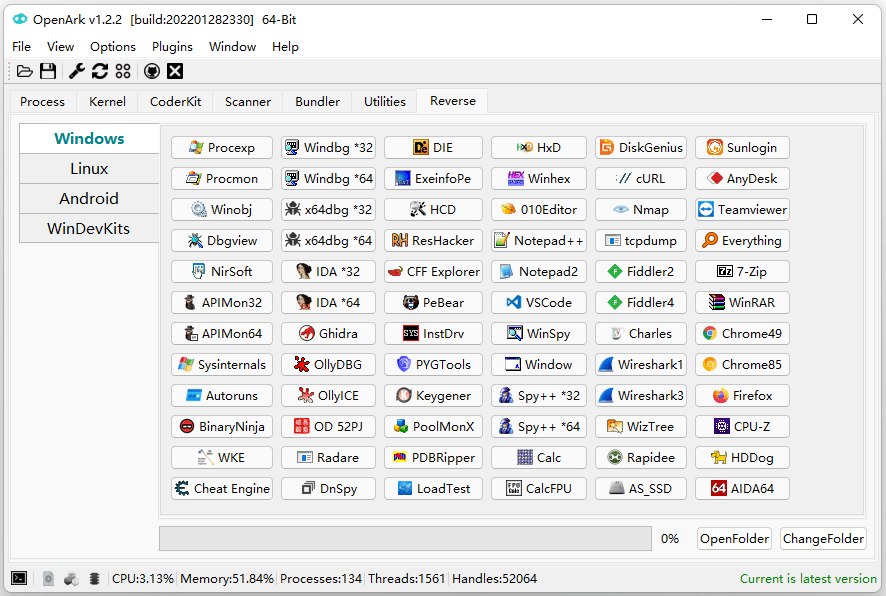
Following the installation of these programs, we’ll deal with Patchguard, which will make it easy to load and test kernel drivers and includes the necessary kernel drivers that hide VMs and debuggers from games.
Disable PatchGuard and DSE with EfiGuard
I’m using EfiGuard EfiGuard which is a UEFI bootkit that will allow us to disable PatchGuard and toggle Driver Signature Enforcement (DSE)
after we download EfiGuard.zip, when we open it we will found the file EfiDSEFix.exe and folder EFI then
- Open Powershell (Run as admin)
- type the command
mountvol B: /Sfor Mounts EFI system partition
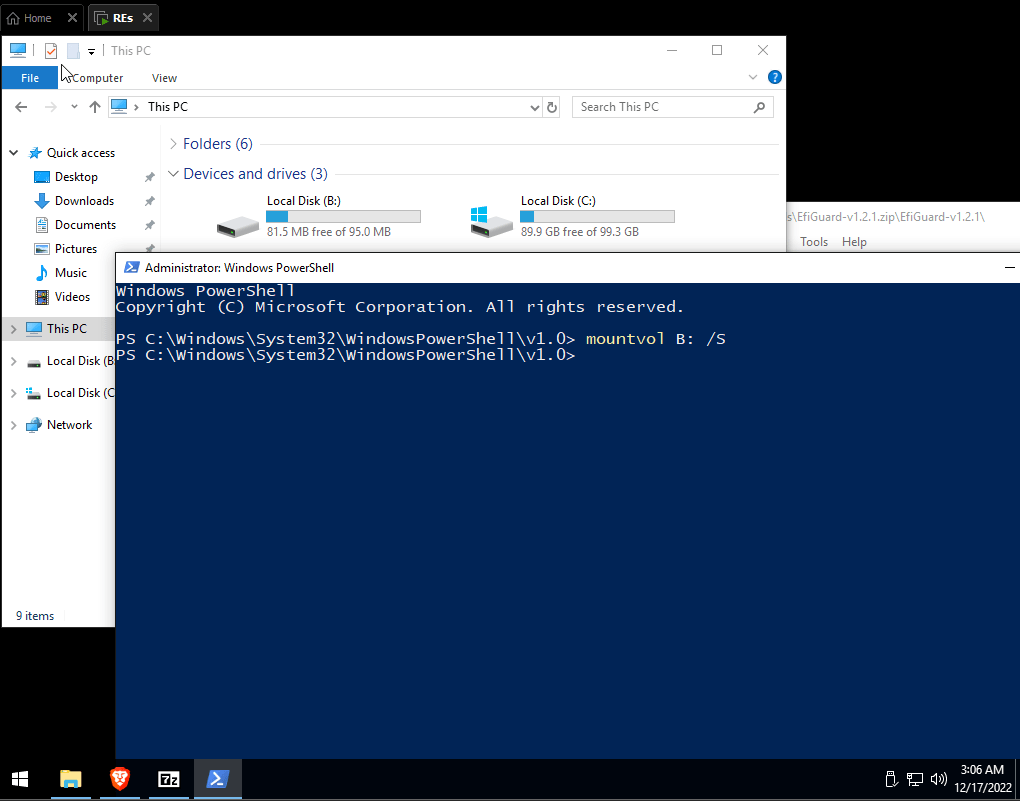
You will see that Drive B: is displayed.
- Go to
B:\EFI\Bootand CopyEfiGuardDxe.efi,Loader.efifromEfiGuard.zip\EFI\Boot\
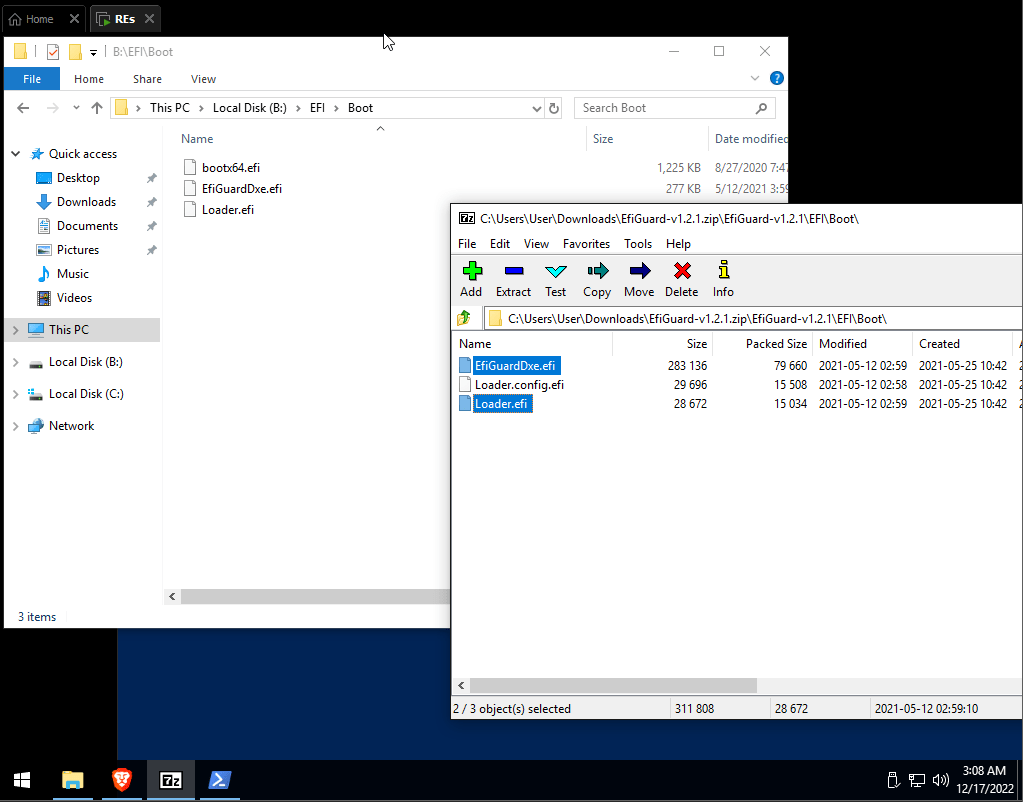
Copy
EfiDSEFix.exefromEfiGuard.zippaste it atC:Now Restart VM and press the F2 key repeatly until you enter the Boot Manager
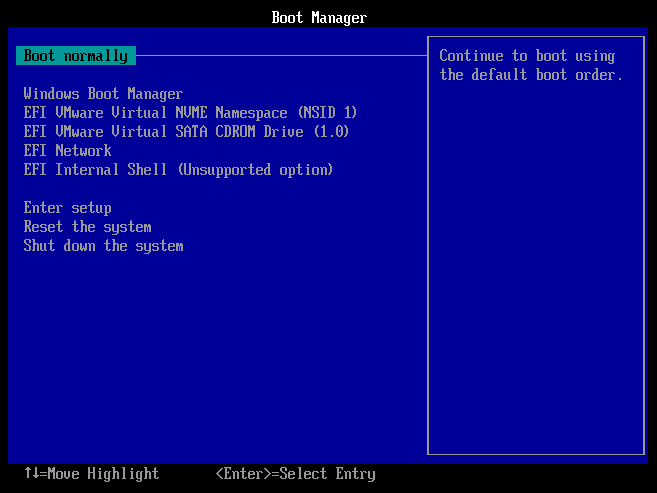
- go to
Enter setup → Configure boot options → Add boot option → select NO VOLUME LABEL → EFI → Bootwill found filesLoader.efi, EfiGuardDxe.efi
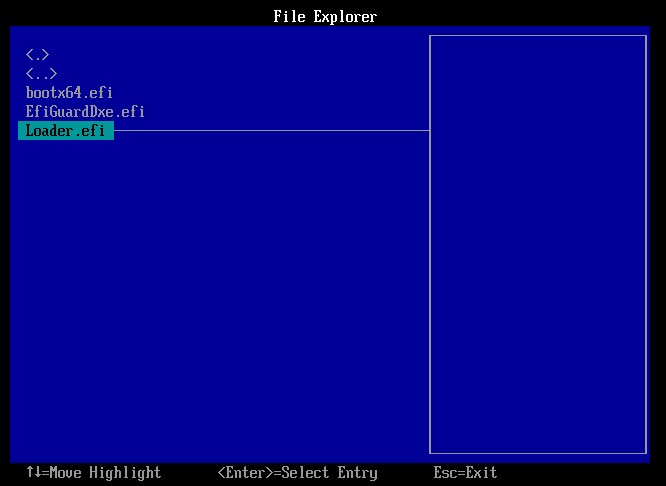
- press Enter select
Loader.efiand enter Input the descriptionEfiGuard
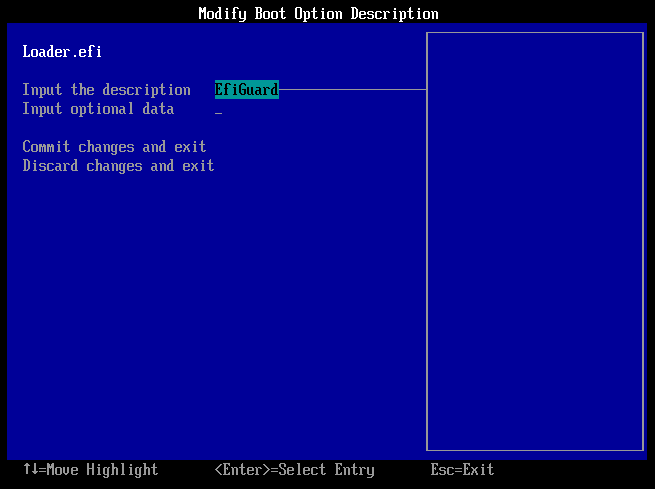
press
Commit changes and exitwill go back to Boot ManagerNow go to
Configure boot options → Change boot order → Change the order → Move EfiGuard to the top
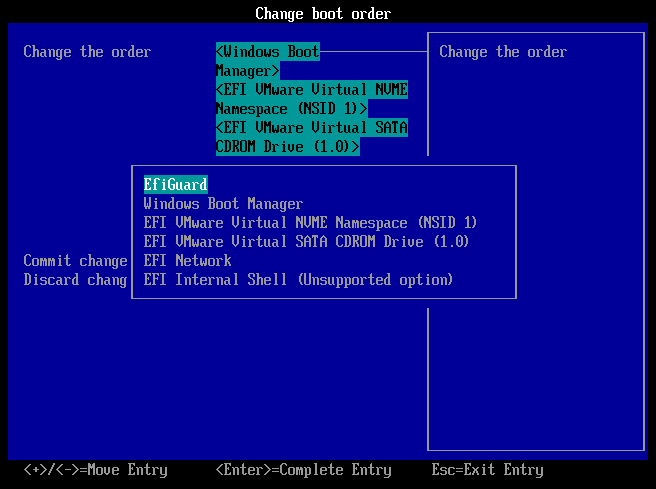
Commit changeandExit boot manager → ShutdownReopen the VM and if installed properly, you will see the EfiGuard Boot page as follows.
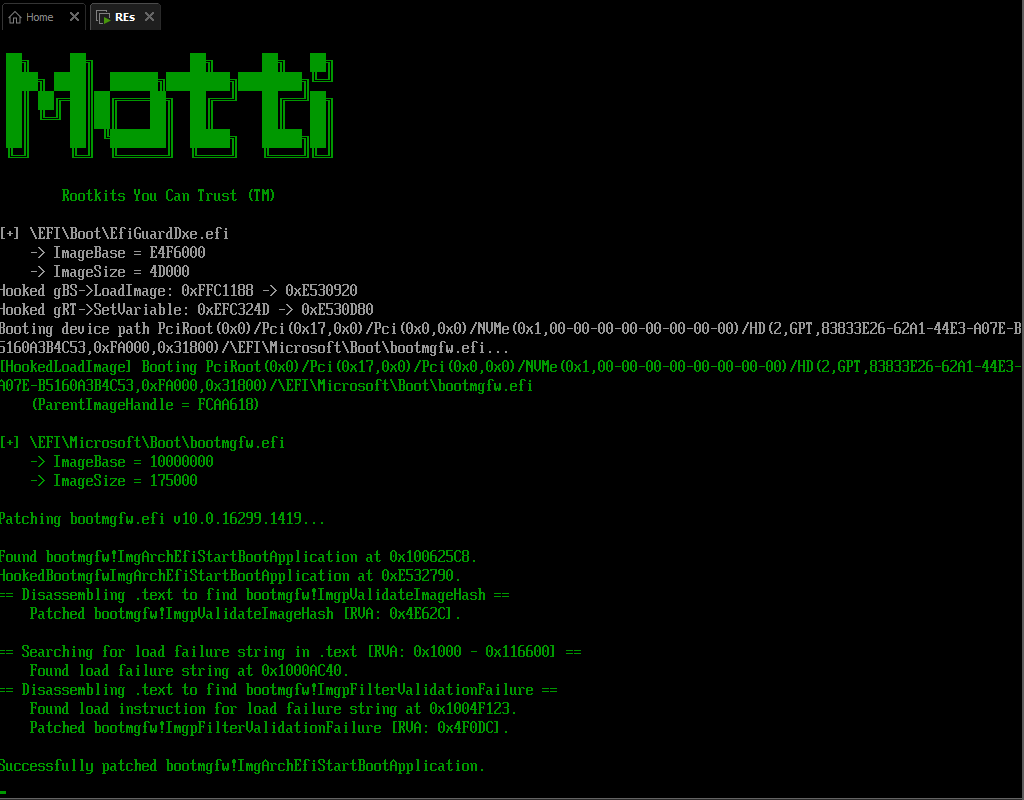
That’s all, now we can start and disable DSE through EfiDSEFix.exe to load and use the Unsigned driver.
by typing
EfiDSEFix.exe -d (for disable DSE)
EfiDSEFix.exe -e (for enable DSE)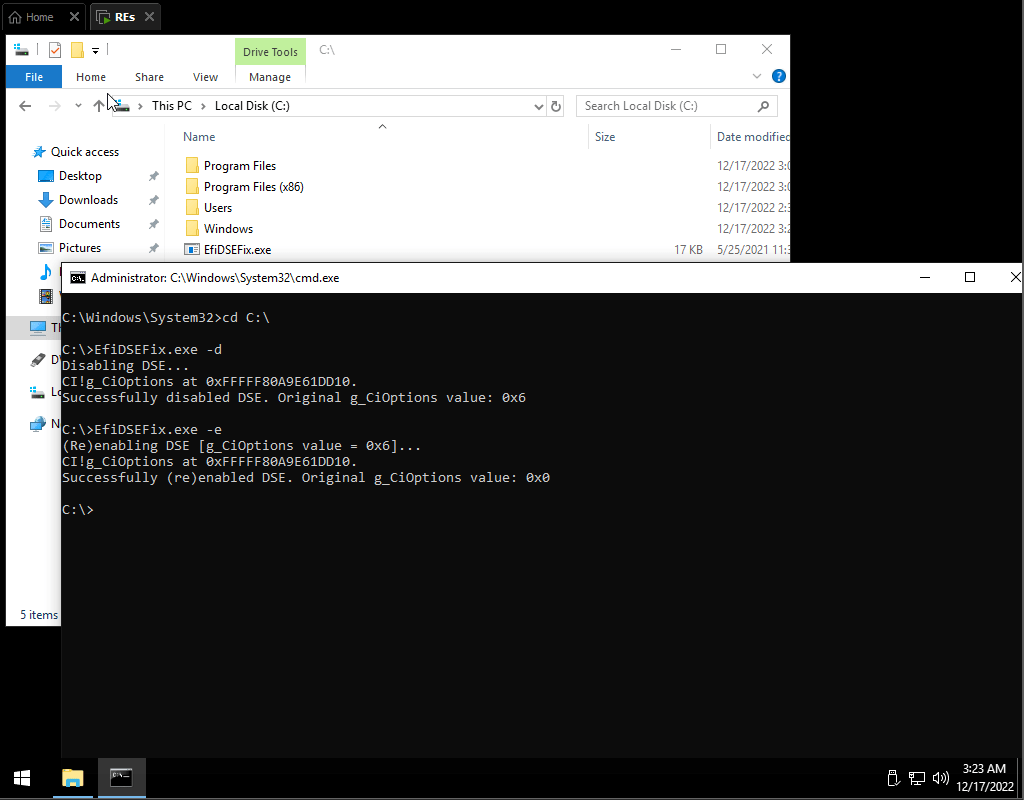
Hiding x64dbg with TitanHide
TitanHide is a driver to hide the debugger from the process. TitanHide
Installation
1. Copy folder `Plugin` from `TitanHide.zip` to folder `x32/x64` in x64dbg directory
2. Copy `TitanHide.sys` to `%systemroot%system32drivers`
3. Run the command `sc create TitanHide binPath= %systemroot%system32driversTitanHide.sys type= kernel` to create the TitanHide service
4. Run the command `sc start TitanHide to start the TitanHide` service.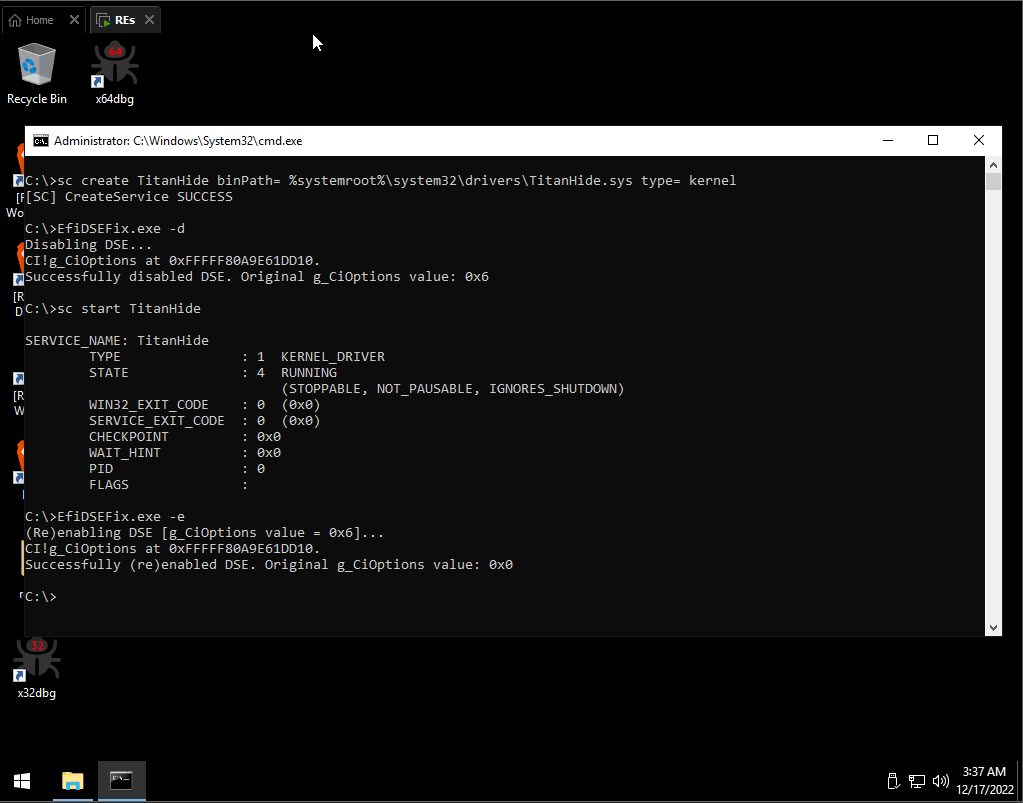
Hiding VM with VMwareHardenedLoader
To hide VMware from some Anti-vm VMHardenedLoader